By: ledirlo
This tutorial demonstrates an effect that gets so photorealistic it led to some cheating controversies in the past. Aside from the interest of the created effect it also gives key layer technique information.
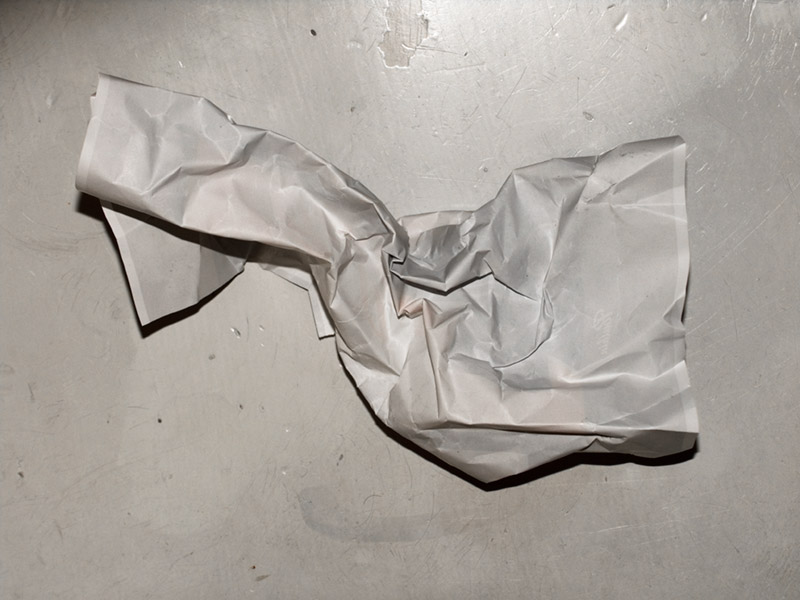
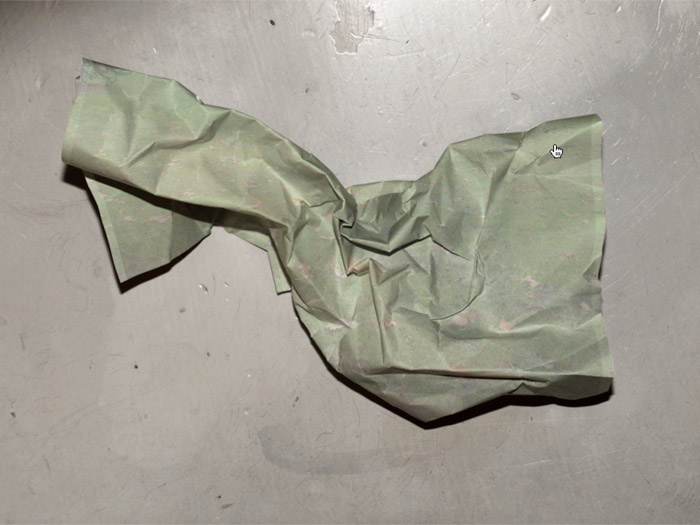
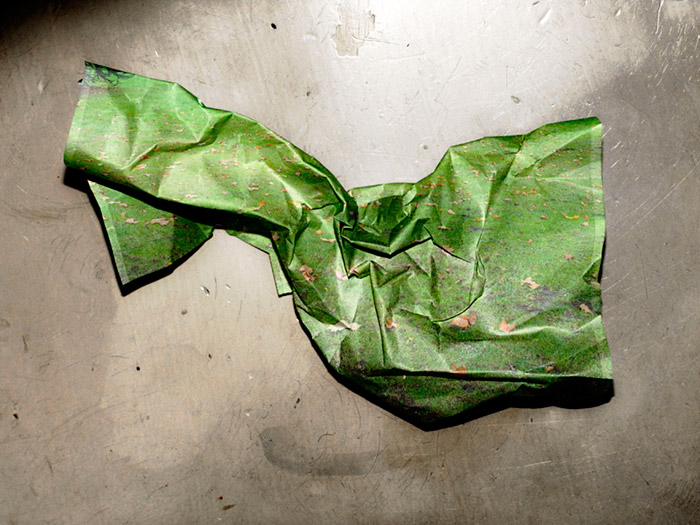
The only material needed is these two photos, the crumpled paper and what we want printed on it.
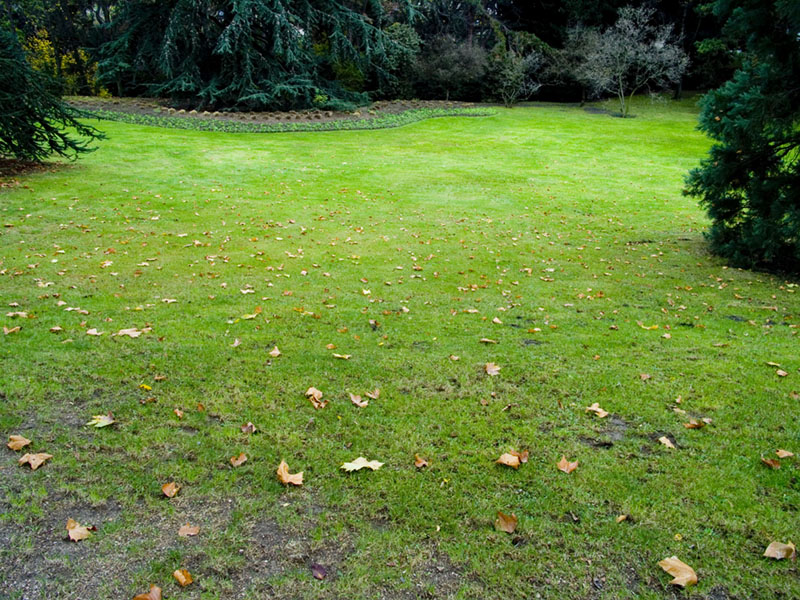
Let's start by opening the two photos and moving the grass photo above the paper's layer; you can turn the grass layer into multiply mode and transform it to get the correct placement.
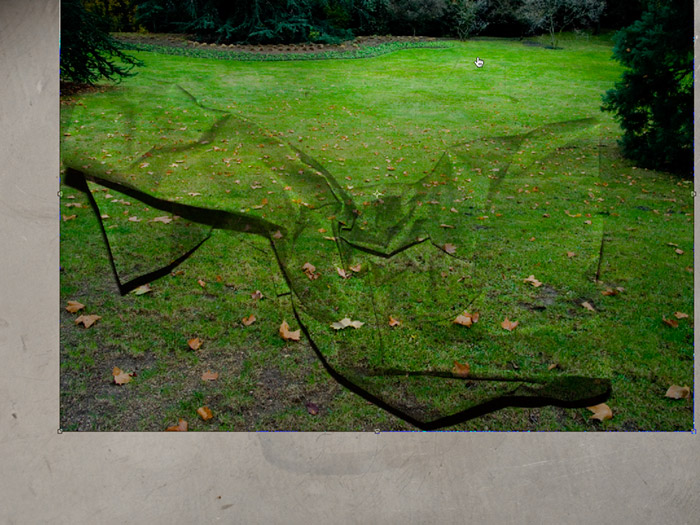
In this case I chose to avoid the darkest tree parts as they don't produce a great effect on the paper.
Now you need to mask the paper in order to separate it from its background using the selection tool you prefer. I personally painted a mask in order to respect the uneven contour of the paper. To do so, apply a layer mask by clicking the adequate button in the layers palette, then choose a brush, black as color, and paint the paper. You can turn the upper layer's opacity down to see what you do better.
Once finished, press CTRL+I so you invert the layer mask.
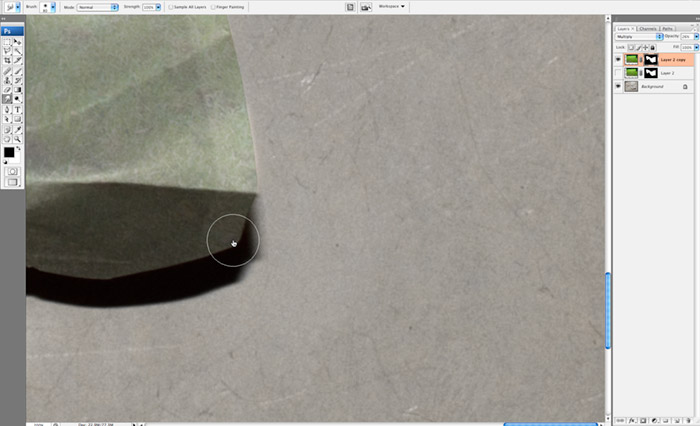
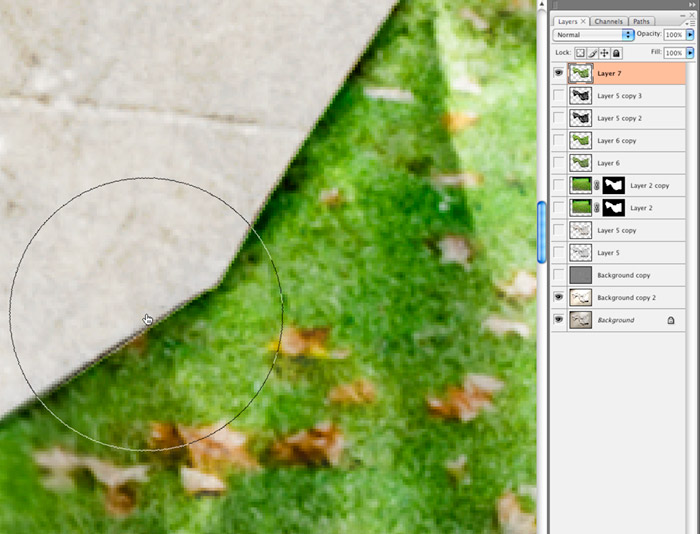
The selection's edges have very little chance of being perfect already so I used the smudge tool with a large soft brush to push or draw the layer mask so it fits the paper edges perfectly.
Now time for using the layer blending modes.
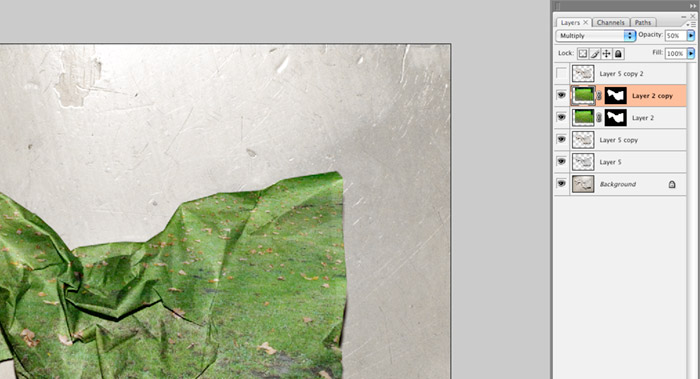
-Take the masked paper layer, duplicate it (ctrl+j), turn it into multiply mode with a 50% opacity.
-Take the masked grass texture layer, put it into soft light mode, duplicate it again and turn the last duplicate into multiply mode with a 50% opacity.
You can now flatten all the texture layers to make a single object above the original background. It will make the further color and luminosity tweaking easier.
To do so, hide the background, create a new empty layer on top and press ctrl+alt+shift+E to merge visible parts onto it.
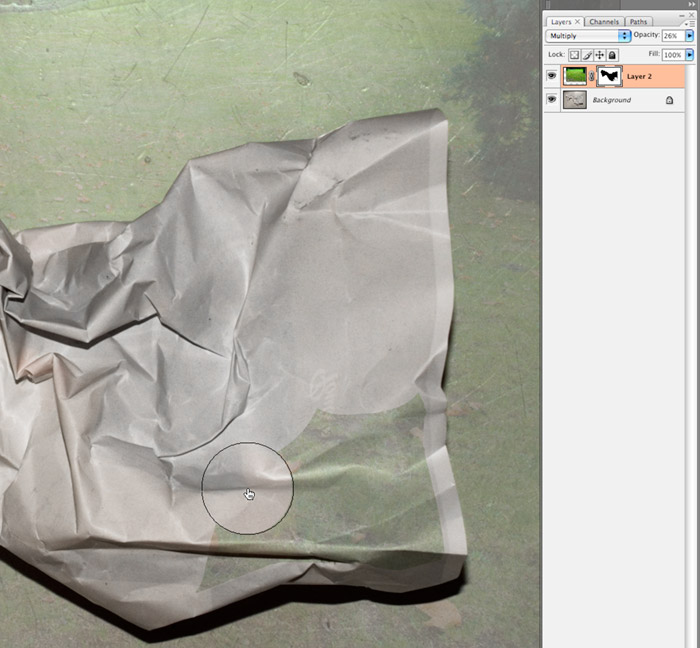
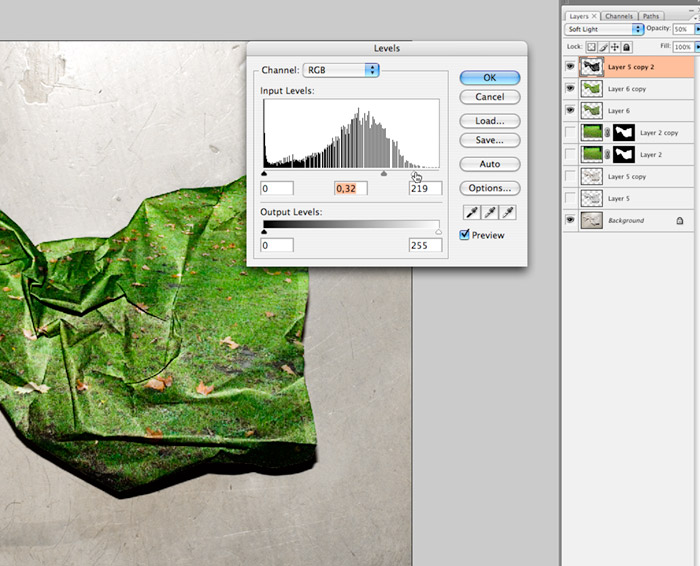
What I did here is that I added a desaturated copy of the paper on top of the mix, switched it soft light mode and played with the levels to add some shades to the whole mix.
Turn that layer opacity to 30%, duplicate it and turn the copy into screen mode with a 50% opacity.
Repeat the previous step: merge the visible paper layers into a single layer, then erase the unused layers so you only have the background and the altered paper layer left. Do some color and luminosity tweaking on the background layer so its properties match (more or less) the ones of the paper.
You will notice now again that the selection was far from being perfect as the enhanced contrast now displays many imperfections : correct them by using the smudge tool like you did to correct the first selection.
Now your selection and its edges are neat, they are both sharp and follow the paper's edges original variations in sharpness and blurryness. We can now flatten everything again to leave only the background, and the textured paper in order to proceed to the final tweakings, corrections and enhancements. In this case I reduced the contrast produced by the various layer blending mode operations and added a little blur to even the too sharp parts.
Need help? Have questions?
� all photoshop tutorials
|