By: ledirlo
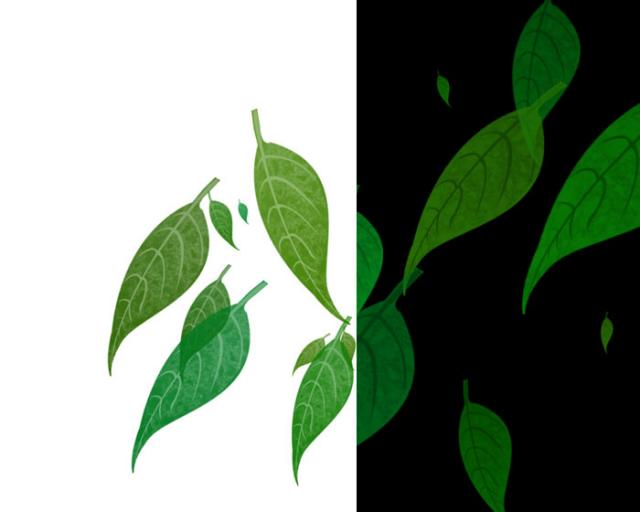
Making Brushes.
Making brushes is an important part of the chopping process for me, and it is an art all on its own you should master. Over the time I went from making normal little quick brushes to some rather intense and advanced ones, so I thought I would share some of this info with you guys and gals here.
First off, there is a lot more available to making a brush than simply drawing it out and setting to brush preset. This is what I want to show you.
Lets start off simple, then get advanced..
To get started, lets just make a simplistic normal little brush by opening a new document and drawing out a shape such as a basic leaf.
Steps:
1. Open a document at 500 X 500 pixels, make sure the background is white.
2. Make a new layer for the drawing so we can use this to select easier in the future.
3. Pick a black brush, and draw out a simple shape such as a leaf.
Note: Be sure for this brush, the color is black, opacity 100%
4. Draw your leaf.
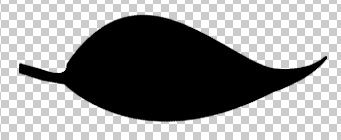
Once finished, Command Click (ctrl click PC) that layer icon to select the brush only,
then click "Edit" and select "Define Brush Preset" and you have just completed this tutorials first simple brush.
Opening your brush palette reveals it in the size and angle originally defined.
Tip1: Set the brush on a straight plane so the brush direction wheel in the brush palette will correctly point your brush so you don't have to guess their direction
Tip2: The size of this brush is how big the brush default will be in presets, so if you want to go big, start big so you can get higher detail and resolution in the future.

Now lets get a little more advanced
. :)
Brushes don't always have to be made in black. In fact, the opacity of the brush it's self is directly affected by the black to white spectrum. Black being 100% opacity, and white being 0 percent. 50% gray would of course be 50% opacity. This can be very helpful when making fauna, hair, and any number of things where you might not want a total saturation of the color..
*Why not just brush on a layer then lower the opacity?*
Simple.. This method, though it can lighten the brush opacity, the brush overlapping is still at the set opacity of 100% FOR THAT LAYER. Total coverage on that layer will happen making only the front leaves show. Basically this means you have no choice but go from back to front when painting grass, so the bottoms of the new blades are not above the rest. You can set the brush palette to behind, but that still limits you. Opacity can fix this issue and allow you to blend in a much smoother and natural looking way.
Now, lets play with our brush, and I will show you how to make it very good for adding fauna and what not.
Advanced Brush Making
1: Lets open our brush back up, and start by picking a gradient starting at "000000" and ending at "404040" (approx. 75% gray).

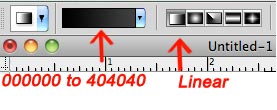
2: Command click the leaf again to select it, and only it.
3: While holding shift, draw a gradient from the tip to the bottom giving it a nice fade.
Note: Shift makes the line go straight so you don't have to.. ;) It works with MANY aspects of PS including brushes, but thats another tutorial..
Look at the 2 following images.. one represents the gradient line you need to draw, and the second is how the leaf should turn out once you release the gradient.
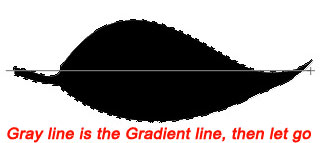
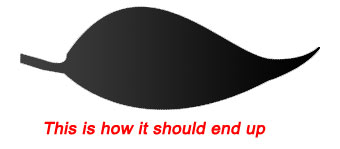
Already, this will allow the brush to somewhat fade as it gets closer to the bottom, but we want to take this farther for this tutorial..
Leaves have veins, so lets add some veins :)
4: Using the pen tool *optional* on a new layer, lets draw some basic large veins.
illustrated on the following images.
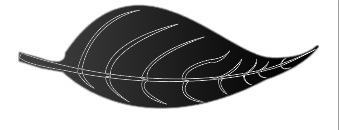
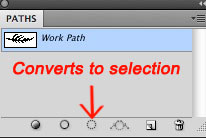
Now, convert it to selection by clicking this button and fill this selection with a 50% gray. That should leave you with something like this....
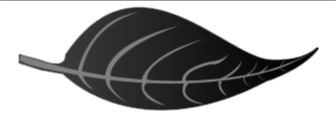
Leaves don't just stop there though, if you want an even more realistic leaf, we need to add the little veins that run throughout.
For the following steps,
5: Make a new layer OVER THE LEAF, but UNDER THE VEINS.
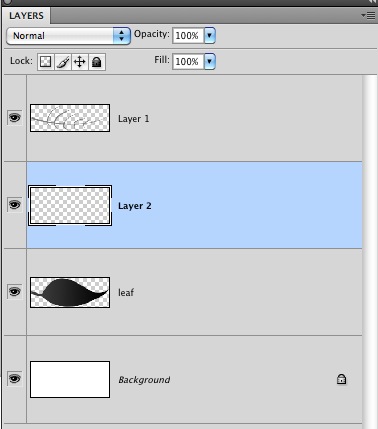
6: Hit "D" to go to default Black and White color palette.
7: Pick the "number 44 Chalk" brush.
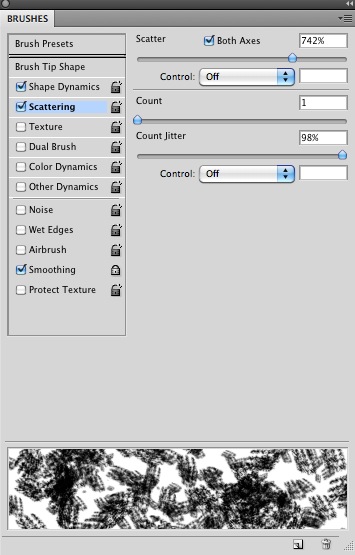
8: hit F5 to bring up advanced brush palette, then pick these settings
Shape Dynamics: Size jitter 100%, Pen pressure off, Minimum diameter 1%, angle 22%, roundness 22%, and Maximum roundness 20%.
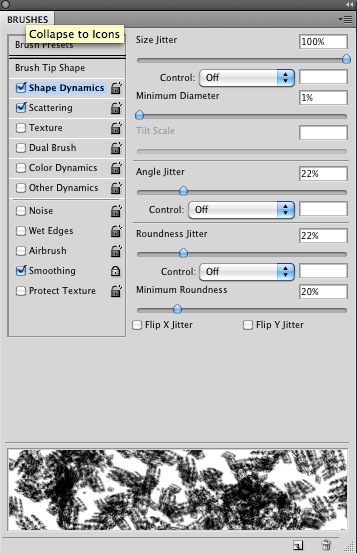
Scattering: Check both axis, control OFF, count 1, count jitter 98%
Note: Smoothing don't really matter for this step..
9: Now give the New Layer a good swoop or 2, Be sure to leave some black and white showing as I have shown..
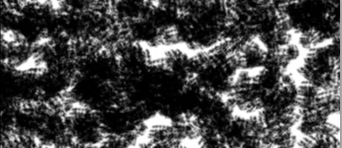
10: Reach up and hit Filter/render pick Difference Clouds.
11: Then Filter/Stylize Find Edges
12: then Filter/Pixelate/Crystalize Set the cells small, (for this, I picked 3).
13: Set your blending mode to lighten, then the opacity to 34%
14 *Optional step* Warp this layer to fit the leaf.
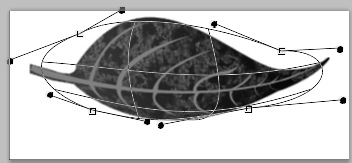
15, IF any of the junk is past the leaf, Option (alt) click in between the layers to set a clipping mask.
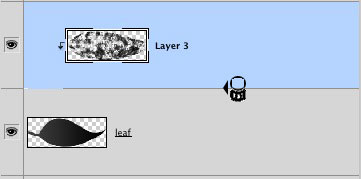
16: Now, merge the top 3 layers together leaving the white underneath.
17: Command Click the layer thumbnail, then hit edit, Define as Brush Preset, and name it. Thats it!! Your all done.
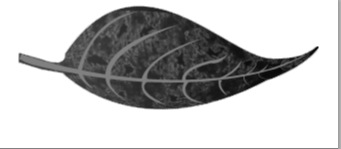
Now you should have a good idea on how to build some more highly detailed brushes.
The good thing about a brush made this way is you can make a brown layer, then paint your green fauna overtop. The differences in opacity allows some of the brown to show through for limbs, stems, and dead stuff, while allowing you to increase the thickness in areas.
Tip: Dodging and burning make fore great depth, and this type of brush is nothing less than awesome for doing just that.
Suggestion, When using a brush such as this, you might not necessarily want the back of the leaf showing so you may cut it off, even more so with a gradient. you can simply pick the brush, and with a soft eraser tool, erase a portion of it. This allows a much bushier looking bush. You can also set a white to transparent gradient to get a stretched effect.
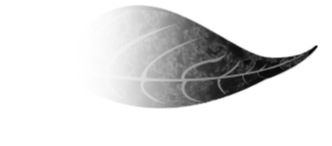
Tip: You can go to black, 100% opacity and click the brush onto a new layer over a white background to recreate it exactly. You can warp, transform and manipulate that brush in an endless number of ways.
Have fun, and I hope this helps someone understand the power of making your own brushes, and the amount of control you really have this way.
PS
In a MAC, when you save custom brushes, they end up here
/Username/Library/Application Support/Adobe/Adobe Photoshop*/Presets/Brushes
Windows (7 and vista), c:/users/username/Appdata/roaming/adobe/*photoshop*/Presets/brushes

� all photoshop tutorials
|