Photoshop Contest Forum Index - Ask the Experts - Help removing flash glare from portraits - Reply to topic
Goto page 1, 2 Next
Dechene

Location: Australia
|
 Sun Oct 04, 2009 6:02 am Reply with quote Sun Oct 04, 2009 6:02 am Reply with quote
Hey guys,
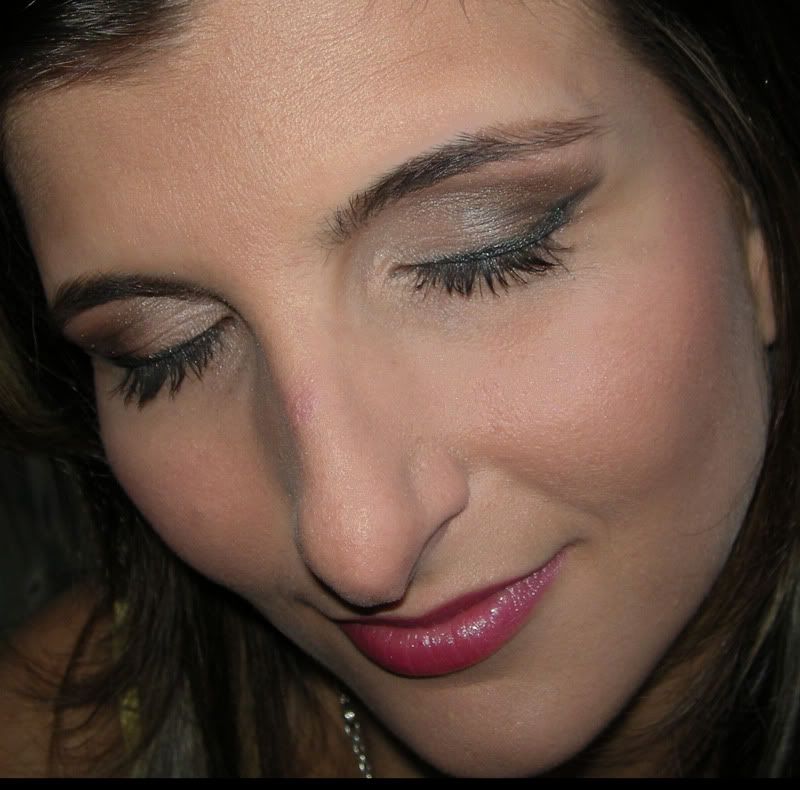
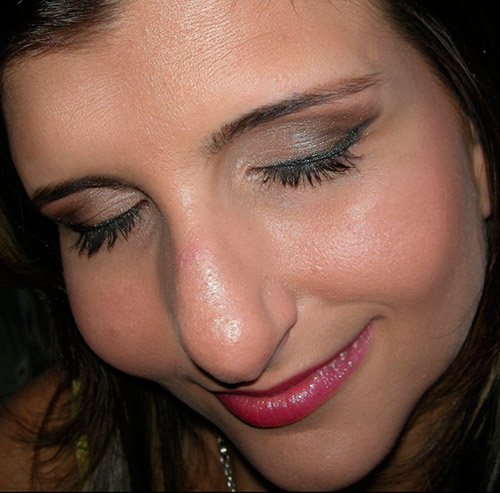
A friend of mine has asked me to remove the glare from some of her photos, she is starting a makeup business and has taken shots of girls she has done in the past.
I've shown her how to best take her photos with the equipment she has, but the ones she did earlier are quite washed out in places.
I'm wondering if anyone knows some tricks / tips when it comes to removing these spots rather than cloning & healing them out which is what I've been doing, is there a quicker & still as effective method?
Thanks in advance,
Mario
here's a sample of what I mean:
|
Granulated

Location: London
|
 Sun Oct 04, 2009 6:40 am Reply with quote Sun Oct 04, 2009 6:40 am Reply with quote
enlarged image
copied layer
use a soft smear tool on the sky of the copy
changed mode to darken..set to about 80%
flatten
woft the a dodge 1% power higlight dodge around for luminance.
|
Dechene

Location: Australia
|
 Sun Oct 04, 2009 6:58 am Reply with quote Sun Oct 04, 2009 6:58 am Reply with quote
Thanks Andy,
I'm not 100% on what "the sky of the copy" means but
the smudging & 'darken' style did the trick.
I used a light guassian blur then set the layer style to darken & dropped the opacity down a bit, only the very brightest parts are left the rest is nicely smoothed out.
cheers,
Mario
|
seamusoisin

Location: Ottawa Strong!
|
 Sun Oct 04, 2009 7:55 am Reply with quote Sun Oct 04, 2009 7:55 am Reply with quote
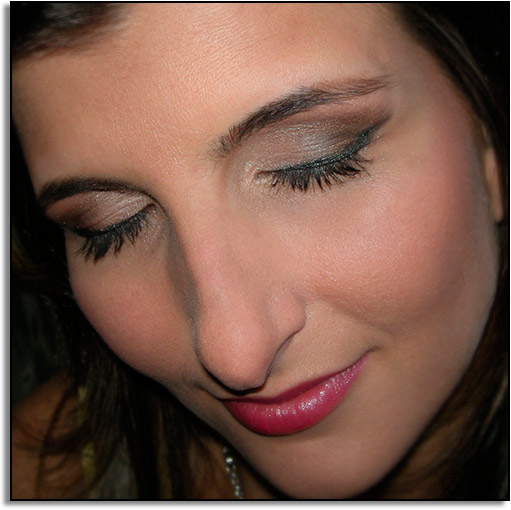
Not that this girl needs work but you can glam it up a bit.
Diferent method here 1) Duplicate layer
2) Change layer mode to overlay
3) Filter/Other/High Pass 10
4) Ctrl + I to reverse
5) Layer Mask and paint with a soft brushe the lips,hair,
eyelashes etc to remove effect.
|
pearlie

Location: Earth, USA: swFL
|
 Sun Oct 04, 2009 10:38 am Reply with quote Sun Oct 04, 2009 10:38 am Reply with quote
eh, sorry about that....
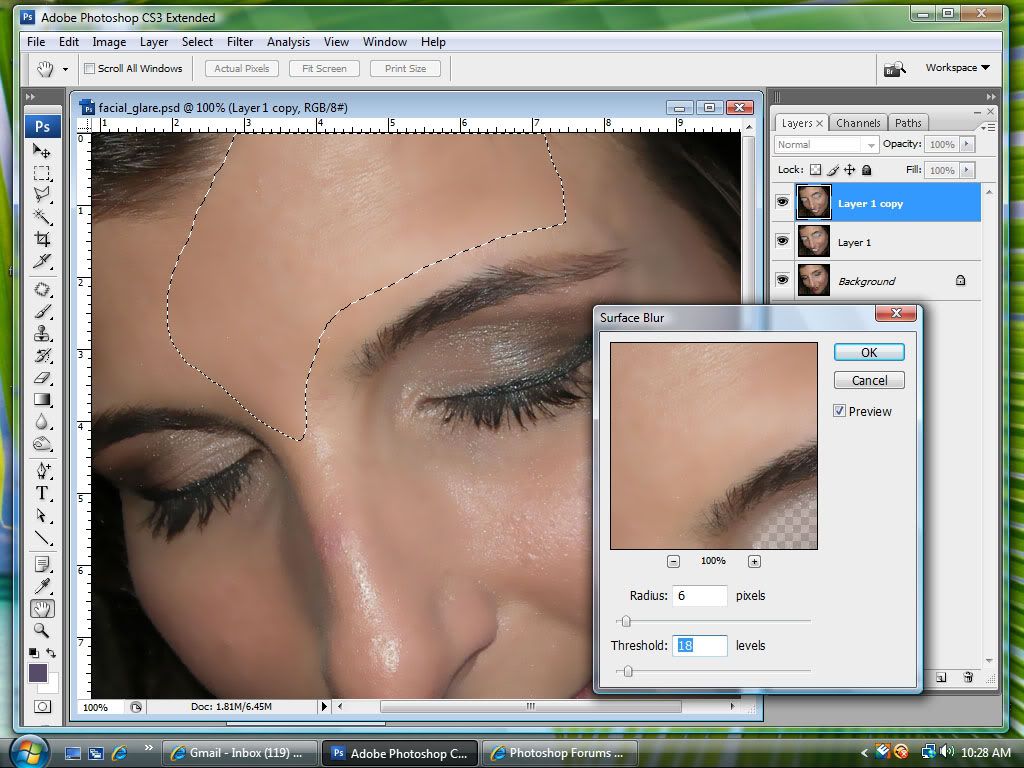
Just one more method I learned from a tutorial recently:
Copy the original image layer.
Go to Filter> Surface Blur.. play with the two settings til you like it.
Erase where the eyes, lips and hair are with a soft brush, I used 30% opacity.
Then use the Patch tool to circle an area that still needs work, and use the
Surface Blur again there.
While the area is still selected, you can go to Edit>Fade if you want to. You can then use the Blur Tool to soften up smaller areas.
Finally, I eased the opacity of the top layer to 97%.
Seamus, yours looks great....
_________________
Enjoy where you are on the way to where you're going.
|
ReinMan

Location: Kingston, ONTARIO, CAN
|
 Sun Oct 04, 2009 10:58 am Reply with quote Sun Oct 04, 2009 10:58 am Reply with quote
One trick I do for this sort of thing is:
Create new layer above image
use Healing Brush set to large size soft edged brush
[important] set SAMPLE window to CURRENT LAYER AND BELOW
grab skin from non-glare areas of face and paint over glare area, making sure to go just a bit outside the glare area
adjust opacity of new layer so that new "skin" blends in over the image below
bonus: grouped the above into a Smart Object, added Lens Blur and then used the Filter Mask to paint in that blur at the edges a bit... adjusted the blur until it seemed just dandy 
I find this technique is good if you want to keep the original skin texture feeling "honest" (the blurring techniques tend to de-humanize a face sometimes, in my opinion).
_________________
_________________________________
THIS SITE REALLY DOESN'T EXIST
the way our EGO THINKS IT MIGHT!
_________________________________
|
pakimo

Location: Norway
|
 Sun Oct 04, 2009 12:43 pm Reply with quote Sun Oct 04, 2009 12:43 pm Reply with quote
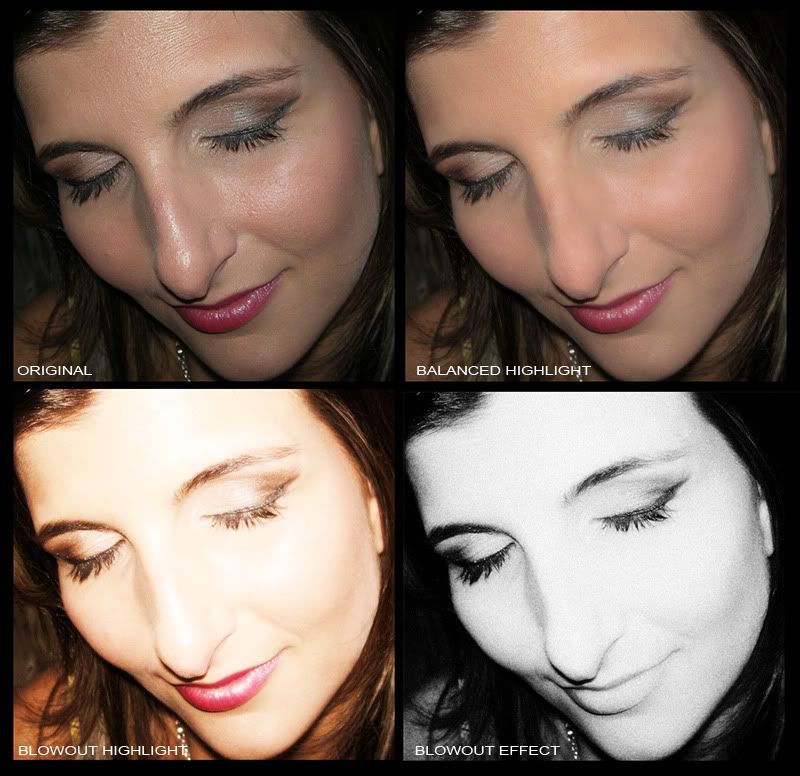
There is several ways I would have gone to make this image the way I wanted. One is to remove the highlight, and other is to enhance it.
Balanced highlight: The way I fix highlight is to make a selection of the highlight on the channel that has the clearest highlight and drawn the selection off the composited channel. And then given it a slight gussian blur. The finished it off with a tiny tiny amount of spot healing. Easy and fast. I wouldn't wanna overdo this and compleatly remove the highlight because the image would then look overworked.
|
ReinMan

Location: Kingston, ONTARIO, CAN
|
 Sun Oct 04, 2009 12:55 pm Reply with quote Sun Oct 04, 2009 12:55 pm Reply with quote
Some good ideas here. And I'm proud of you guys n gals! No one tried to do an UGLY version of this poor woman. Very good self-control shown here, peeps! 
.
.
.
.

_________________
_________________________________
THIS SITE REALLY DOESN'T EXIST
the way our EGO THINKS IT MIGHT!
_________________________________
|
pearlie

Location: Earth, USA: swFL
|
 Sun Oct 04, 2009 1:00 pm Reply with quote Sun Oct 04, 2009 1:00 pm Reply with quote
Well, I WAS gonna say that yours was pretty much the best, Reinman, tho I do like Pakimo's very much, too........
but then ya had to go and do THAT to this poor girl.  You should be ashamed....... You should be ashamed....... 
I tried your method, Reinman and couldn't quite get it without getting 'spots'.
Obviously, there are several ways to do something in photoshop. 
_________________
Enjoy where you are on the way to where you're going.
|
ReinMan

Location: Kingston, ONTARIO, CAN
|
 Sun Oct 04, 2009 5:59 pm Reply with quote Sun Oct 04, 2009 5:59 pm Reply with quote
Marx-Man wrote:
The tan gone.
 Just what a girl wants! 
(well, a GOTH girl...  )
_________________
_________________________________
THIS SITE REALLY DOESN'T EXIST
the way our EGO THINKS IT MIGHT!
_________________________________
|
Dechene

Location: Australia
|
 Sun Oct 04, 2009 6:15 pm Reply with quote Sun Oct 04, 2009 6:15 pm Reply with quote
Careful guys, you don't want to give PSC.com a reputation for helping people do you??
But seriously, thanks a lot, quite a few methods here I can play with and see what works best for each image.
And to Reinman:
Fortunately I don't know this chick or I probably wouldn't have put her pic up here! Thanks for showing restraint guys!
(but if you wanted to play around with it I can't really stop you now can I??  )
|
pearlie

Location: Earth, USA: swFL
|
 Sun Oct 04, 2009 6:33 pm Reply with quote Sun Oct 04, 2009 6:33 pm Reply with quote
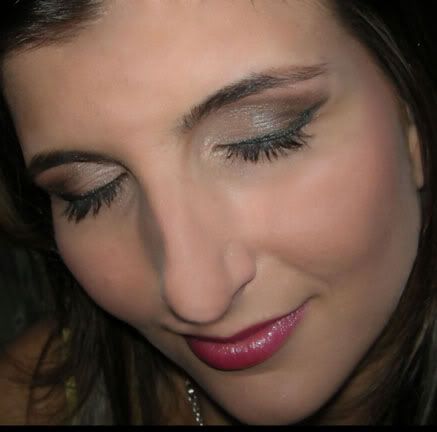
I decided to start over - after all, this is good practice. 
Mostly, I used the patch tool - I like it a lot compared to the clone tool,
tho at the end I did use the clone a bit also, wanting to keep some natural texture.
After I got the glare cleaned up with the patch tool, I decided to do her a favor and give her a
virtual dose of rhinoplasty (a nose-job). For that I nudged the tip of her nose and top left lip
with the liquify filter, then used the clone tool below her nose.
I'm happier with the loss of glare with this version. If you're not used to using the patch tool,
try it - it gives great results that blend very nicely.
Comments welcome.
_________________
Enjoy where you are on the way to where you're going.
|
Eve
Site Moderator

Location: Planet Earth
|
 Sun Oct 04, 2009 7:00 pm Reply with quote Sun Oct 04, 2009 7:00 pm Reply with quote
Nice work, pearlie...and everyone else. It would be so nice if one of you would subdue the shadow along her nose that looks like a bruise though.
_________________
"Recently, NASA scientists discovered that most people love to play video games but hate to die in fiery airplane crashes." lifted from mason4300
|
Goto page 1, 2 Next
Photoshop Contest Forum Index - Ask the Experts - Help removing flash glare from portraits - Reply to topic
You cannot post new topics in this forum
You cannot reply to topics in this forum
You cannot edit your posts in this forum
You cannot delete your posts in this forum
You cannot vote in polls in this forum
|


