By: ReinMan
My Happy Toaster
One
of the main things that every PhotoChopper needs to know is how to free-up,
or separate, different parts of an image. With programs like Photoshop
there are a number of ways to do this. But this particular tutorial
will deal with one of my favorite way to get this sometimes challenging
job done. And the main tool for this tutorial will be:
THE
PEN TOOL 
Although
there are a number of sub-tool-types for this item, we will be focusing
on the basic Pen Tool which is accessed under the icon shown above on
your PS tool bar. Choose it by clicking on the icon, or for bonus points
use the keyboard shortcut by pressing "P" to select it.
 Open
a simple (160 x 120) pixel NEW IMAGE. Take the pen tool and click on
it in two places: You'll note that you get a straight line connecting
where you click (see A). If you keep clicking
different places, you'll continue to get more straight lines connecting
the dots. Open
a simple (160 x 120) pixel NEW IMAGE. Take the pen tool and click on
it in two places: You'll note that you get a straight line connecting
where you click (see A). If you keep clicking
different places, you'll continue to get more straight lines connecting
the dots.
You've
just created a PATH. So far so boring. Let's get into the FUN part of
the pen tool - Bezier Curves!
But
first, clear your current 'work path' by going to your PATHS
palette (find under Windows: PATHS if you can't find it already
open somewhere). There should be a 'layer' labeled WORK PATH. Click
on it and then click the TRASH CAN at the bottom of the path palette
(or drag that path to the TRASH CAN). This clears the previous path
you were working on.
 Now
create another NEW IMAGE. This time click once and then, when you do
the following clicks HOLD DOWN THE MOUSE BUTTON (do not release). WOW,
things start happening! Now
create another NEW IMAGE. This time click once and then, when you do
the following clicks HOLD DOWN THE MOUSE BUTTON (do not release). WOW,
things start happening!
First
thing you'll notice is that the connecting line curves, and
depending on how you move the mouse around BEFORE RELEASING IT it curves
differently. The second thing you'll notice is that little "knobs"
or "antenna" sprout out of the line. The places you've clicked
will have empty circles, and are called ANCHOR POINTS. The "knobs"
will show up as smaller and black. These are called CONTROL POINTS,
or DIRECTION POINTS and will normally show up on both sides of the ANCHOR
points.
While
the PEN TOOL is active you can change how the curve behaves in real
time. If you (on PCs) hold down the CNTRL key you'll get a hollow white
arrow. With this tool you can move the ANCHOR points around and reposition
them, and also move the DIRECTION POINTS to adjust how the line curves.
If you instead hold down the ALT key you'll get a little "V"
arrow - with this tool you can change the angle of the CONTROL points
for more drastic (and more accurate) curve behaviors.
It
is way beyond this small tutorial to cover all that you can do with
these CONTROL POINTS and ANCHOR POINTS, but trust the ReinMan - you
can do A LOT!
For
more indepth info and tutorials on Paths and the Pen toolclick
here.
For
now, I'm going to go on and show you how this tool can be used for specific
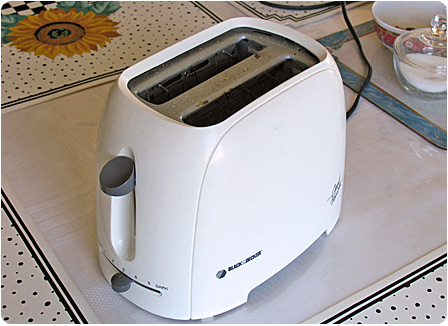
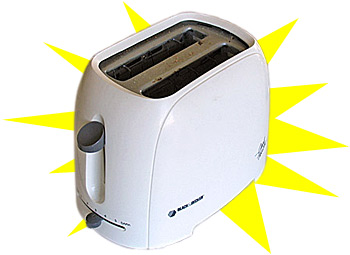
SELECTION usage. In this case, to FREE MY TOASTER!!
You
can use the picture of my toaster at the top of this tutorial to practice.
 |
-
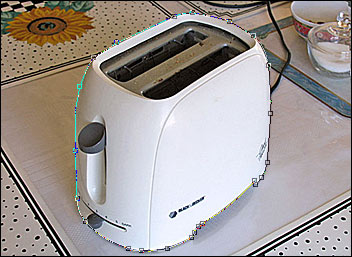
by using the PEN tool and carefully 'tracing' around the toaster
I have created a PATH. The picture below will show you a closer
detail of the PATH tracing. |
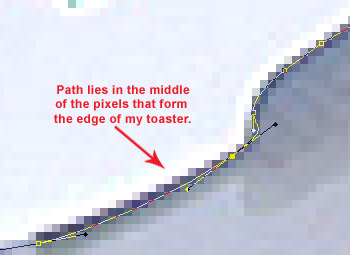 |
-
as you can see, the path is not pixilated but remains flexible.
With practice you learn how to "ride the edge of the pixels"
to best advantage.
If
you make an error you can use the PATH adjustment tools to bend
it to your will until you have your object perfectly
surrounded!
|
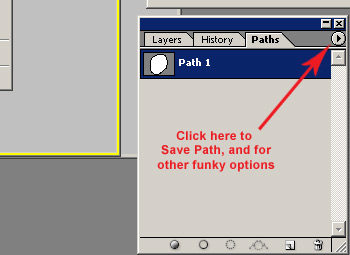 |
-
once you are happy with your path, you can click on the PATH OPTIONS
arrow in the PATHS palette, and then choose SAVE PATH. This PATH
will be saved with your PSD and you can still edit it to your
heart's content at any time in the future. Or copy it and have
a few "edits" of the path saved. A PATH is much more
flexible for solid edged objects than a normal Selection. |
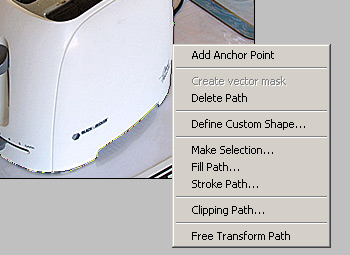 |
-
Okay. We are getting to the goods now. With the PEN TOOL selected
RIGHT CLICK (PCs) on the path you've just created. You'll get
a pop-up selection box similar to the one show at left.
Choose
MAKE SELECTION.
|
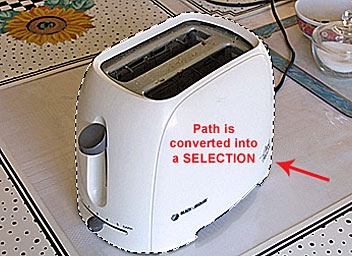 |
-
Ta Da! The toaster is now selected exactly following
your PATH. Depending on which version of PS you have, the PATH
is deselected and the Selection remains. If the path is still
there, go to the PATH palette and select the gray space UNDER
the PATH layer to deselect it. |
 |
-
then, you can COPY the selected area into a new document, or
CNTRL+J (PCs) to have PS copy the selected area into a new layer
above the original.
The
TOASTER IS NOW FREE TO ROAM WHERE IT WISHES!
|
Some of the benefits of using PATHS to create selections are:
I wouldn't
use this technique for "fuzzy" objects, or objects that have
a un-clean edge (eg; hair or spraying water) BUT a Path is a great way
to give a definite edge to a "fuzzy" object if needed!
� all photoshop tutorials
|