Photoshop Contest Forum Index - Ask the Experts - Tips, Teasers, and HIDDEN SECRETS of the CHOP - Reply to topic
Goto page Previous 1, 2, 3 Next
|
|
 Wed Mar 30, 2005 3:26 pm Reply with quote Wed Mar 30, 2005 3:26 pm Reply with quote
two keys I wouldn't get very far without.
Alt + Tab
You can be doing anything and switch back to what you were supposed to be doing in the first place without getting caught.
|
Doodler!

Location: Ohio
|
Wed Mar 30, 2005 5:31 pm Reply with quote
YAY i will add some info to this thread later on..
BTW I use CNT-SHIFT-ALT-E on the PC all the time.... I call it "Punching the keyboard" but its nice when blending elements or making skin disorders
f7 - layer pallete
use adjustment layers.....and love the layer mask.. this is all I have ATM.. be back later on
|
Patre

Location: Glendale, Az.
|
Wed Mar 30, 2005 5:37 pm Reply with quote
This one wasn't obvious to me when I first came on the site. Then, it was Robin, who clued me in: That if I held the shift key down on the first stroke of the paint brush or any other tool, and then clicked the paint brush, lets say, 20 pixels away, A straight line paint stroke, erasure etc., would result. It saves a lot of time, when you don't want to paint in
all those straight lines.
|
ReinMan

Location: Kingston, ONTARIO, CAN
|
Wed Mar 30, 2005 11:04 pm Reply with quote
Some good advice here - since this has dropped off the main page already I have taken the AUDATIOUS BEHAVIOR of bumping it back up. Perhaps we'll get some more great tips:
Like - after using the pen tool to create a closed path, hold down CNTRL and hit ENTER. BOOM, its now a selection! (the path is still available in the PATH pallette, but this technique turns it off so you only have a selection active. To reactivate your path just click on it in the PATH pallette.
:^)
|
sage

Location: Hudson, Canada
|
Thu Mar 31, 2005 1:24 am Reply with quote
OK, OK, I've got one...
Again, on the mac, option-delete paints the active layer (or selection, or pixel, if the layer is locked) with the foreground colour, and command-delete with the background colour. (or is it the other way around?  )
_________________ "Life is what happens to you while you are busy making other plans." John Lennon
|
Doodler!
Location: Ohio
|
Thu Mar 31, 2005 7:04 am Reply with quote
I use this for a sharp blending .. its a take on jerry 717's method of sharpening
after you are somewhat done with an image
1. make a new layer and hit Cnt-shift-alt-e (or punch the keyboard)
2. duplicate that layer 2x
3. select the top duplicate and goto image>adjustments>invert
4. set that layer on 50% opacity (now you should have a gray screen)
5. go Filter>blur>gaussin blur and set it at 3.0 then work your way down untill the edges look visable and kind of beveled... but still lack all color
6. now select the layer below that one and create a curves adjustment layer, when the menu comes up just hit ok
7. set the curves layer on overlay
8. hold your pointer between the curves layer and the inverted layer and alt-click
(after doing this you should see your image.. and it will be sharper)
9. merge the duplicated and curves layer (leaving the original one)
9.5 duplicate the original layer..
10. set the merged layer on luminosity.(should be called curves)
11. now merge the duplicate and curves layer...
11.5 duplicate the merged layer
12. with the top layer selected go Image>MODE>CMYK and DO NOT FLATTEN
you are left with 2 adjusted layers and the original.... now using the top one go into channels and look for your blending problems.... This is the best way to see small inperfections... If a channel is too noisy, blur it.... after you have fixed the issues set that layer on the mode that makes it look best.... what I do is select the layer mode thing then use my arrow keys to scroll through them... then adjust the opacity
now move down to the middle layer and sharpen the lightest channels.... then set that layer to luminosity and adjust the opacity.... this is a neat layer
if your image still isnt blending well then duplicate the original and set it to overlay.. then gaussin blur the shit out of it.... and adjust the opacity... this will give you a smooth gradiant light over the entire image...
you can also make a white and black gradiant on an empty layer on top... then set it to overlay or one of the light layers (just look through them and find what is best) then set adjust the opacity to taste... you can also paint the lighting with white and black brushes instead of the gradiant... but I like the look of gradiants hehe
oh make sure you go back to RGB when done
|
ReinMan
Location: Kingston, ONTARIO, CAN
|
Thu Mar 31, 2005 10:01 am Reply with quote
Holy Fuck, Doodler! That isn't a TIP, or a HIDDEN SECRET! That is a WHOLE RELIGION!
YIKES! My brain exploded just reading your tut! 
(But thanks, I didn't need my brain anyway - it was too much damned trouble, eh?)
|
buglover

Location: Hamburg, Germany, Europe, right hand of the USA
|
Thu Mar 31, 2005 12:35 pm Reply with quote
sage wrote: Again, on the mac, option-delete paints the active layer (or selection, or pixel, if the layer is locked) with the foreground colour, and command-delete with the background colour. (or is it the other way around? )
combine this with shift and it will just fill the pixels (without having to lock it)
by the way ommand-delete and option-delete are fast ways to change the color of Text.
_________________
Once he was addicted to psc - Now he's dead and free.
|
sage
Location: Hudson, Canada
|
Thu Mar 31, 2005 2:39 pm Reply with quote
Great, thanks, Buglover...I'm sure I'll use that one often.
Here is a link to a pdf file with all the PS7 shortcuts (mac only...sorry). Clicking on this link will download the file automatically. I don't usually like these links because I like to have control over what I download. Anyway, here it is:
www.digitalretouch.org/download/hotkeys/PS7HotKeys-Mac.pdf
There are two pages to this pdf file, and the text is very small. You can zoom in to read.
I think we should have a quiz next week. Anybody? ....Hello?.....
_________________ "Life is what happens to you while you are busy making other plans." John Lennon
|
Doodler!
Location: Ohio
|
Thu Mar 31, 2005 4:17 pm Reply with quote
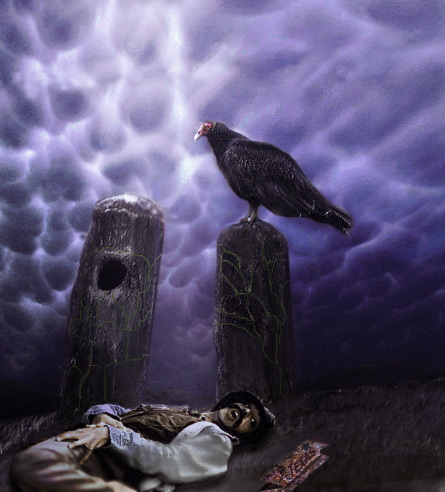
sorry heh... I honestly do that in all my pics lately... it brings out the highlights and makes the edges look more natural... then the overlay one will basically do the lighting for you..
I used a gradiant layer on this to make the surreal lighting 
|
ReinMan
Location: Kingston, ONTARIO, CAN
|
Wed Apr 06, 2005 9:15 pm Reply with quote
nice pic doodlerMan!
No more tips folks? Is that the BEST YA GOT? 
|
supak0ma

Location: Photoshop Nation
|
Thu Apr 07, 2005 5:09 am Reply with quote
press D to have the foreground/bg colors go back to default black and white, ctrl+h hides/shows extras (guides etc..). to give a soft glow to the pic: duplicate your image in another layer on top of everything, gaussian blur it, lower opacity...ta-da.
|
Zingaro

Location: Italy
|
Thu Apr 07, 2005 6:42 am Reply with quote
To adjust crisp border of an objet i go this way.
- ctrl+clik on the layer to select it
- go to select/inverse ctrl+shift+I
- expand the selecton by: select/modify (i use 1/2 pixels)
- then ctrl+alt+D (feather selection) insert 1 or 2 pixels again
- go on with Canc (the effect increasing everytime you press it) and thats it!
|
Terminator!

Location: From the Future
|
Fri Apr 08, 2005 12:07 am Reply with quote
There is so much hidden power in the blending modes of PS (Multiply, screen, overly, vivid light, etc) but it's a pain in the arse to go through them and try them out for a given layer.
So try this shortcut:
click on the layer whose blending mode you want to change to make it current.
then press SHIFT ALT and the PLUS or MINUS sign to quickly cycle through all of the blending modes.
It's wonderful!
_________________
You know what seems odd to me?
Numbers that aren't divisble by 2.
|
ReinMan
Location: Kingston, ONTARIO, CAN
|
Sat Apr 09, 2005 1:30 am Reply with quote
Great tips all. I've already improved my VPP emmensly!!! (or imensely) (er, A LOT!)
Soon I'll be up to 14vpp and then you will all suffer my arrogant bliss.
But in the mean time keep on tossing those Mind Numbing Secrets our way!
Like:
do a selection
CNTRL + J copies it to a new fresh layer
CNTRL + SHFT + J cuts it from the layer and moves it to a NEW HAPPY LAYER
|
Goto page Previous 1, 2, 3 Next
Photoshop Contest Forum Index - Ask the Experts - Tips, Teasers, and HIDDEN SECRETS of the CHOP - Reply to topic
You cannot post new topics in this forum
You cannot reply to topics in this forum
You cannot edit your posts in this forum
You cannot delete your posts in this forum
You cannot vote in polls in this forum
|