Photoshop Contest PhotoshopContest.com
Creative Contests. Real Prizes. Essential Resource.
You are not logged in. Log in or Register


Photoshop Contest Forum Index - Tutorials - Reflections - Reply to topic

Goto page 1, 2  Next

bigbuck

Location: Australia

Post Sat Jul 12, 2008 8:53 pm   Reply with quote         


Following on from shadows thread
http://photoshopcontest.com/boards/viewtopic.php?t=8281&postdays=0&postorder=asc&start=0

Here's my very basic understanding of reflections from my old high school 'geometric drawing and perspective' days. Have a look at real-life reflections as a guide.


If I'm looking at boxy, linear objects....after figuring out where the vanishing points are, I keep the same vertical distance at the closest point and let the vanishing lines figure out the rest.


there's not really that many instances when you can simply flip an image and paste it. Maybe on the end of an object that is more or less perpendicular to the viewer....you could probably just flip the end.


bigbuck

Location: Australia

Post Sat Jul 12, 2008 8:56 pm   Reply with quote         


Most times you will have to merge 2-3 or more flipped and skewed mages in order to construct a realistic reflection.

This is very quick and dirty....


bigbuck

Location: Australia

Post Sat Jul 12, 2008 9:00 pm   Reply with quote         


I hope Jerry doesn't mind me using his Humvee here. I used two skewed images, but the front wheel was too distorted, so I added in a third for it.


You can get away with a few errors depending on how much reflection is going to be shown. If you're only going to see an inch or so like in the Humvee, I wouldn't panic too much about the vanishing lines fiurther down.


bigbuck

Location: Australia

Post Sat Jul 12, 2008 9:07 pm   Reply with quote         


I suppose the simple rules are...
1. Keep significant points vertically below and equidistant at that nearest point.
2. Try to vanish the reflection to existing vanishing points from the real object.


the burning couch

Location: I don't know, but it sure is dark in here

Post Sat Jul 12, 2008 9:56 pm   Reply with quote         


bigbuck wrote:
I hope Jerry doesn't mind me using his Humvee here. I used two skewed images, but the front wheel was too distorted, so I added in a third for it.


You can get away with a few errors depending on how much reflection is going to be shown. If you're only going to see an inch or so like in the Humvee, I wouldn't panic too much about the vanishing lines fiurther down.


Cool Hey, that looks like a great method. I'm gonna try that one sometime.
Tanx! *!*


_________________
Half of writing history is hiding the truth.~ Mal
Goat1981

Location: Austin, TX

Post Sat Jul 12, 2008 11:02 pm   Reply with quote         


Great thread! This is a bit different than the technique I use to make multiplane reflections. I'll try this next time the situation comes up. Very Happy Thanks, bigbuck! This is something everyone who struggles with reflections should read!


_________________

anfa

Location: Geordieland, UK

Post Sat Jul 12, 2008 11:11 pm   Reply with quote         


Great stuff bucky like type bloke. Now teach Marco perspective! Wink


_________________

caprix3

Location: Caracas, Venezuela

Post Sun Jul 13, 2008 12:12 am   Reply with quote         


Thanks very useful ! Smile


seelcraft

Location: High Bridge, New Jersey

Post Sun Jul 13, 2008 12:14 am   Reply with quote         


Bigbuck: really clear way to explain planes and perspective! This needs to be posted in required, permanent tutorials!


_________________
Seelcraft
Chemists have solutions!
jerryhami

Location: home

Post Sun Jul 13, 2008 2:18 am   Reply with quote         


Thanks Again. You can use my mistakes anytime.


annajon

Location: DEAD THREAD DUMPINGGROUND NEAR YOU

Post Sun Jul 13, 2008 2:57 am   Reply with quote         


There is one other thing to realise as well. If your object is on a shiny surface like a road, then you can use all the above methods. But if your object is reflected in water and is not close to the water, then the distance the object is away from the water edge counts as hight NOT reflected in the water.

Think of a hilltop and a lake. The hilltop is much further away from the water, so sometimes only what is ON TOP of the hill will show reflected in the water!!!

The point where all the lines get together is the horizon and that is ALWAYS your point of view - meaning, your eyes are making the horizon.

PS

This is also usefull when you want to create doors or gates in a distance. Anything above your own hight, is above the horizon, anything smaller then you, is below the horizon.

And when you paint other people, same deal. People smaller then you have their eyes below the horizon (children) people taller then you have their eyes above the horizon. (Beach scenes, people in roads etc.)


annajon

Location: DEAD THREAD DUMPINGGROUND NEAR YOU

Post Sun Jul 13, 2008 3:10 am   Reply with quote         


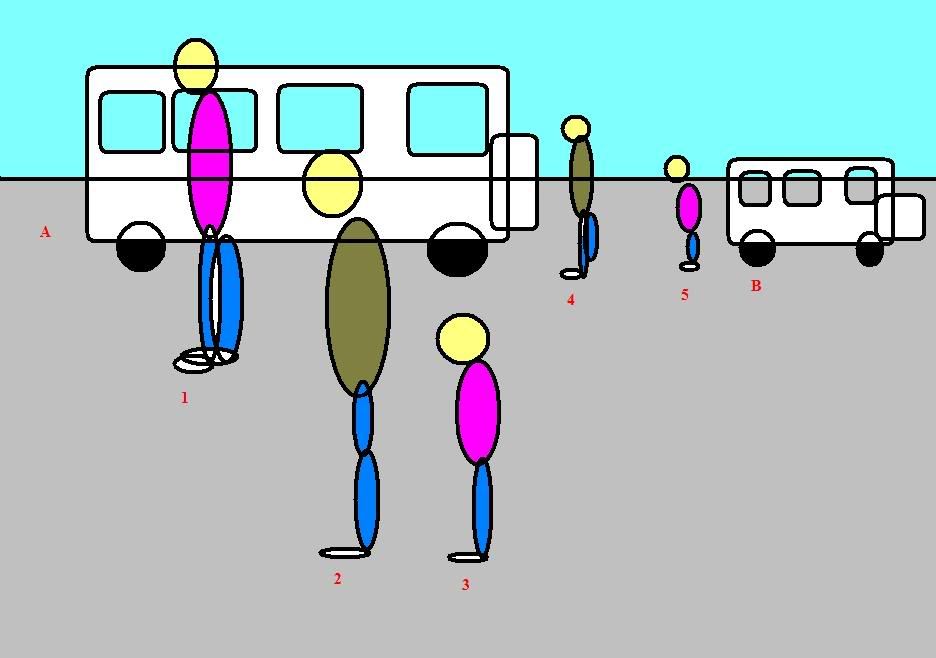
Both vehicles are higher then you - in this sample

And only one person in the picture is just as tall as you are - and one is smaller.

nrs 1, 4 and 5 have their eyes above your horizon so they are taller then you, nr. 3 has his eyes way below your horizon, so he is much smaller then you, and nr. 2 has his eyes ON your horizon, so that person is just as tall as you are.

Now, going from that point on, you can calculate the hight of every other object, because all you need to do is know your own hight, and then you can calculate the hight of all other objects in the picture.

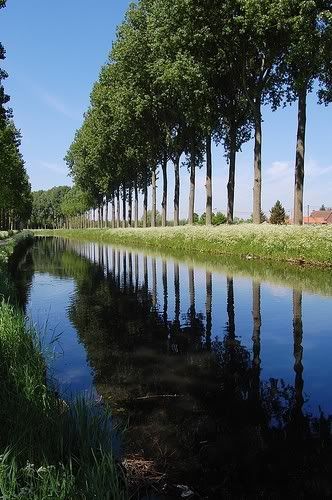
If the front of the image were water, then only the nr. 2 and 3 persons would reflect in the water. All others would be too far away from the waters edge to be reflected or would only have the tops of their heads reflected. Because you "flip" the reflexion at the horizon. Look at the first image Bigbuck put up again, there you see that the buildings and bushes don't reflect in the water at all. They are "covered" by the forground.


blue_lurker

Location: Australia

Post Sun Jul 13, 2008 3:11 am   Reply with quote         


Sweet stuff Buck-a-Roo, we had this talk once about sphere reflections a while back and it had some good pointers in it as well so if ya interested heres a link

http://photoshopcontest.com/boards/viewtopic.php?t=9124


_________________

bigbuck

Location: Australia

Post Sun Jul 13, 2008 3:38 am   Reply with quote         


The same rules basically apply with objects situated back from water. Significant points are directly below. The only difficulty being finding the point where the water level WOULD be directly below said point. See the blue crosses in the pic of some shapes beside a swimming pool.


bigbuck

Location: Australia

Post Sun Jul 13, 2008 3:41 am   Reply with quote         


Using the method ABOVE, and the blue crosses, you would be able to determine whether an object was too far away (or too short) to be reflected in the water.


Goto page 1, 2  Next

Photoshop Contest Forum Index - Tutorials - Reflections - Reply to topic

You cannot post new topics in this forum
You cannot reply to topics in this forum
You cannot edit your posts in this forum
You cannot delete your posts in this forum
You cannot vote in polls in this forum


Navigate PSC
Contests open  completed  winners  prizes  events  rules  rss 
Galleries votes  authentic  skillful  funny  creative  theme  winners 
Interact register  log in/out  forum  chat  user lookup  contact 
Stats monthly leaders  hall of fame  record holders 
PSC advantage  news (rss)  faq  about  links  contact  home 
Help faq  search  new users  tutorials  contact  password 

Adobe, the Adobe logo, Adobe Photoshop, Creative Suite and Illustrator are registered trademarks of Adobe Systems Incorporated.
Text and images copyright © 2000-2006 Photoshop Contest. All rights reserved.
A venture of ExpertRating.com