It's been asked a few times even in the short amount of time that I've been a member here and I've made a couple that are (according to me

) half decent, so I thought I'd have a crack at writing a tut for gifs.
I'm making this in Photoshop 7.0 which has ImageReady 7.0 included with it.
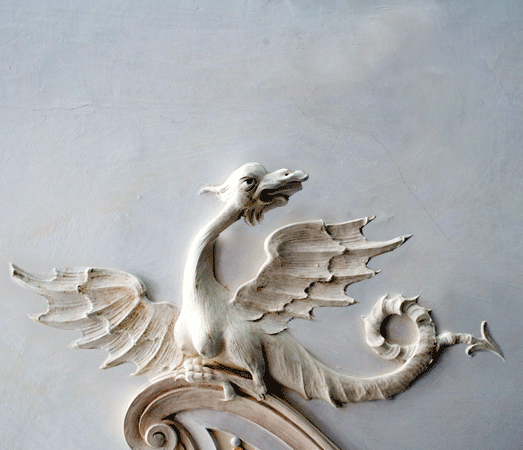
I'll use my Dragon gif as the example.
This isn't the most detailed GIF, but it does the job well and still has room leftover in the filesize for more frames & better quality pixels, ie only 386kb while PSC lets you upload up to 512kb.
To start with, plan what you want to do. If you change your mind halfway through it can be a lot of work to be redone or thrown out, so decide what you want the animation to do.
In this case, I wanted the head & wings to rise up and smoke to come out of it's mouth.
If the GIF is for PSC, resize it to fits the rules, max 550px wide by 450px tall.
First I cut out the pieces which were going to move and copied them to separate layers. I always name layers in gifs, head, left_wing, etc, it makes a lot of difference later on.
Then I duplicate each layer once. Photoshop automatically renames it 'head 1' or whatever, this helps you keep track of what part of the animation is on.
Now the fun part, start the animation.
All you have to do is rotate the 'head 1' layer slightly so the head turns up a little, then just smudge, clone, heal or draw over the join (on 'head 1') so it looks smooth.
When that's done, just dupe 'head 1' & you'll get 'head 2'. Same again, just move it slightly and smooth the join.
I only have 3 frames for the head in this gif.
Repeat this process for the wings. I kept both wings on separate layers so I could move them individually up and down, once again it makes things easier & once again only 3 frames were needed to make the distance.
With the smoke, I decided to put a few extra frames in to smooth the fade out and extend the animation a little.
First I put the smoke where I wanted it, then duped it, erased parts, duped that, erased more of it, etc. By working backwards I rubbed it out pretty smoothly.
Make all your frames invisible (except the background) and you're ready for
The Animation!
Click on the 'Jump to ImageReady' button & wait for it to open up your image.
Click here to create a new frame, I normally figure out how many I'll need, (3 heads up, 5 smoke, 3 heads down = 11 frames) & create that many straight away.
On the first frame, make the original layers visible, they should be the ones without a number in their title.
Then select the 2nd frame, now make the original layers hidden & make the 'head 1' layers visible.
See where I'm going here?
You can click the play button at any time and see how things are going, hopefully all is well.
If you decide that something doesn't look right, click 'Jump to Photoshop' and fix it up, then go back to ImageReady and check it out.
Once all your frames are in place you can work on the timing. You can set any frame to play for any amount of time. Play around and see what looks good to you.
I generally have either the first or last frame pause for a half second or so, it gives the viewer a break, sometimes GIFS just fly by too fast and repeat too quickly.
Just FYI, I have noticed that Firefox tends to ignore timing settings, while Chrome & IE are pretty good at following the rules.
Once you are happy with the animation click on the '2 Up' tab.
This will show you the GIF & a compressed version, colours will be lighter/blurrier & it may look a bit sharper. On the bottom of this window it will tell you the optimized gif filesize.
If it's too big for PSC, you have a few options.
Compressing the GIF
Tools in the Optimize window are the easiest way of bringing you GIF down to size. You can change settings manually or try the presets in the dropdown menu.
The quickest way is reducing the amount of colours, GIFS use 256 colours, drop it to 220, you might save enough space & be able to stop there.
You can also increase the 'lossy' figure, this will bring noise into the picture to drown out details, low levels of this can help drop a file size quickly.
TIPS
If you still can't drop the size down, you can delete some of your frames.
You can resize the image to make it smaller.
If you have an image with lots of vibrant colours, reduce the saturation.
The more the picture changes the bigger the file size. Therefore if you move an large layer sideways, a lot of information needs to be stored.
If you can limit the movement to just parts of the layer, an arm, mouth or whatever, then only the parts that are different from the previous frame need to be stored.
Make sense?
Every time you make a change, just hit the play button. This will play the original & the optimized gifs side by side, letting you know if you've gone too far, or if it is looking good.
Saving the GIF
All you have to do once the file is the right size is go to file, and 'Save Optimised as'.
This will save a copy of the gif with the optimal settings you have selected, easy peasy, japaneasy!
There you go, hopefully that all makes some sorta sense and is correct. I probably left out a major step but, hey, waddya gonna do?!?
Now I'm not a pro chopper or tutorial writer, but I know a couple of GIF tricks that may be helpful to some people, so don't go and call this tut amateur or rubbish or whatever because A; I won't care, B; I never said it would be, and C;

Feel free to contact me (don't hang out for a speedy answer), but if I can help, I'll try!
Dechene/Mario