|
|
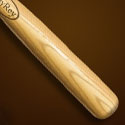
Making A Wooden Baseball Bat
by: ReyRey - 09/10/2011Here's how you make a realistic wooden baseball bat completely from scratch. A longer tutorial but very worth the time to do.
Read this photoshop tutorial
|
|
|
|
|
|
|
|
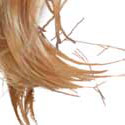
Making Brushes
by: SCWIDVICIOUS - 02/22/2010Making brushes is an important part of the chopping process for me, and it is an art all on its own you should master. Over the time I went from making normal little quick brushes to some rather intense and advanced ones, so I thought I would share some of this info with you guys and gals here.
Read this photoshop tutorial
|
|
|
|
How to Create GIF Animations
by: Tawiskaro - 03/17/2009Whether this is your first time creating a GIF animation or not, this tutorial will be able to help you with the concept and technique of how to create them.
Read this photoshop tutorial
|
|
|
|
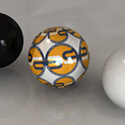
Shadows (Part I)
by: ledirlo - 04/26/2008In this first theorical part of this four part shadow tutorial, shadows will be explained using 3D software. The analysis of the shadows will prepare you for part two.
Read this photoshop tutorial
|
|
|
|
More Texturing
by: ledirlo - 04/02/2008This tutorial demonstrates an effect that gets so photorealistic it led to some cheating controversies in the past. Aside from the interest of the created effect it also gives key layer technique information.
Read this photoshop tutorial
|
|
|
|
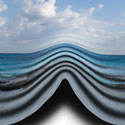
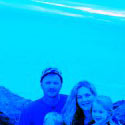
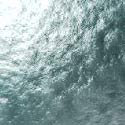
Displacement Water
by: aliased - 03/15/2006Creating a realistic water surface in Photoshop is quite a challenge because it is the distorted reflection of the surroundings that makes the water look liquid. The displace filter is an excellent tool for making this distortion.
Read this photoshop tutorial
|
|
|
|
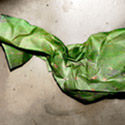
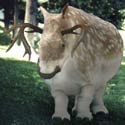
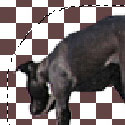
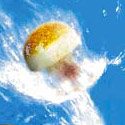
The Liquify Filter
by: armogeden - 02/10/2006This is a tutorial to show you how to transform animals into other animals
by using the liquify filter and for those of you who want and actual example,
how I made this picture.
Read this photoshop tutorial
|
|
|
|
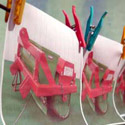
Object Transformation
by: Claf - 12/23/2005First, it's important to visualize enough well if there's enough elements in the original picture
that can be used to make the transformation. Secondly, it can be helpful to find some good
pictures as references to make the new object. For this one, I used no reference.
Read this photoshop tutorial
|
|
|
|
Clipping Mask 101
by: ReinMan - 12/23/2005There is one funky feature of Photoshop that many people seem either terrified of, indifferent to, or possibly in ignorance of. I speak, of course, about the Dreaded Clipping Mask feature of Photoshop.
Read this photoshop tutorial
|
|
|
|
Making Snow
by: YerPalAl - 02/03/2005Making snow is not all that hard, but it does consume some time. We
will start with an earlier picture that is appropriate and start with
the basics and proceed from there. First thing I do with any chop is to
up the resolution from the crappy 72 dpi to 300. This allows me cleaner
work overall. This also adds some steps that may or may not be needed
if you dont do this.
Read this photoshop tutorial
|
|
|
|
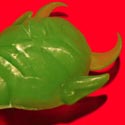
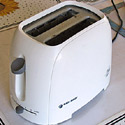
The Peel Effect
by: Brent - 12/07/2004The Peel Effect is a (cliché) way to turn an object in a spectacular eye caching image.
You peel of the skin of an object, so the inside will be visible. Im going to peel a bulb.
Read this photoshop tutorial
|
|
|
|
Simple Wood in Photoshop CS
by: irishstu - 12/06/2004It used to be a lot of work to make realistic-looking wood in Phototoshop, then Photoshop CS came along with its extra fancy filters, especially the one were going to use today, the Fibers filter. Now its as easy as one, two, three. Just follow this simple tutorial.
Read this photoshop tutorial
|
|
|
|
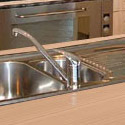
Photograph Color Correction
by: ScionShade - 12/06/2004Color correction can be done in moments. It is a simple
and effective way to take your digital images and make them warmer, brighter and
more pleasing to the eye. We will use "Threshold", "Curves", a little erasing. Finally, for an added punch we'll use PS's "Color Filter". After doing this process a couple times, an image can be greatly
enhanced in only one or two minutes.
Read this photoshop tutorial
|
|
|
|
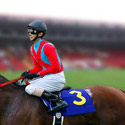
Depth of Field
by: chadchud - 11/30/2004For the effect i wanted to create, I needed to work on the original
image before it was to be pasted into the main file. I wanted the image
to look printed, with bleeding lines (as if the head wasn't aligned
properly) and I wanted the colours to be slightly different, and a bit
more plain.
Read this photoshop tutorial
|
|
|
|
Perspective
by: Fugue - 11/29/2004Have you ever looked at an entry and thought "something looks wrong
here, but I can't quite put my finger on it"? Well, 9 times out of 10,
it's probably a perspective problem. Sometimes you can cheat or "force the perspective" without it being
an obvious problem, just as you can cheat the realism of
shadows/reflections to some degree.
Read this photoshop tutorial
|
|
|
|
Cutting Up
by: ReinMan - 08/02/2004Taking things from one image and putting them into another image is one of the basic concepts that one needs to master if one is to continue down the path to Photoshop Guruhood. I'll go step by step through this process and perhaps you'll pick up a few tips along the way.
Read this photoshop tutorial
|
|
|
|
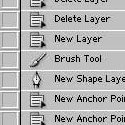
Pen Tool as Mask Selector
by: ReinMan - 05/05/2004One of the main things that every PhotoChopper needs to know is how to free-up, or separate, different parts of an image. With programs like Photoshop there are a number of ways to do this. But this particular tutorial will deal with one of my favorite way to get this sometimes challenging job done. And the main tool for this tutorial will be: the pen tool.
Read this photoshop tutorial
|
|
|
|
Textures
by: ledirlo - 04/05/2004Here I want to explain some of the terms you have to understand when you come to creating textures for 2D or 3D rendering: the aspect of a "texture" is obtained my mixing different channels and/or maps, and we have to give a definition for every of them.
Read this photoshop tutorial
|
|
|
|
Masks
by: ledirlo - 04/05/2004In the first lesson about cut/paste stuff, I just wanted to let newbies it existed...but the masks are just the key to being able to modify, retouch, tweak your image anyway you want.
Read this photoshop tutorial
|
|
|
|
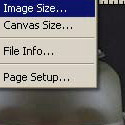
History
by: ledirlo - 04/05/2004The history palette is just like a fantastic expansion of the edit menu: it lets you handle different states of your documents so you can always go back, it lets you save some RAM, and is especially usefull when you submit different versions of a project.
Read this photoshop tutorial
|
|
|
|
Color and Luminosity
by: ledirlo - 04/05/2004Light is the basis of photography, therefore it's the part one has to master in order to produce consistent pics, but it is also the toughest part.From correcting the colors, the exposition, painting the highlights and shadows, and/or reflections, handling glossiness, light should be the center of your preocupations.
Read this photoshop tutorial
|
|
|
|
Layer Blending Optons
by: ledirlo - 08/13/2003As you may have noticed, the bevel option is very very cool, as it lets you make a pasted object more realistic, though it is more obvious when it is set with a background, so the depth cue is more obvious.When you buy Photoshop, you discover you have many layer styles that are pretty useless, according to me they are just included so you get to learn how they work.
Read this photoshop tutorial
|
|
|
|
Blending Layer Modes
by: ledirlo - 08/12/2003The layers blending modes are the quintessence and the most powerfull
aspect of Photoshop. They interact with eachother differently according to the colors and modes
you use; but before get try some funny stuff, we should understand the
basics.
Read this photoshop tutorial
|
|
|
|
General Design Tips
by: ledirlo - 08/11/2003Photo editing, or illustration may be practiced for fun, but no one can pretend being a "designer" without knowing the rules of graphic design.Many people think that being original, and thinking out of the box is a good thing, but it actually isn't if you don't follow the rules...Even the weirdest looking ads,or the funniest ones, follow these rules.
Read this photoshop tutorial
|
|
|
|
Photoshop Introduction
by: ledirlo - 08/09/2003You may find just as many tutorials as you want on the web,the fact is that most of them will show you how to replicate an effect, etc....which is pretty useless, as long as many people dont know the basics of Photoshop. These tutorials will try to teach you how to use Pshop by yourself, not in order to make effects, but in order to edit photographs.
Read this photoshop tutorial
|
|
|
|
Cut and Paste Options
by: ledirlo - 08/09/2003The most important thing to master in Photoshop is how to perform perfect cut/paste operations.You may want to try effects, or illustration, a great pic is always simple, and CLEAN. No blurry edges.
Read this photoshop tutorial
|
|
|
|
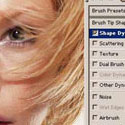
Photoshop Brushes
by: ledirlo - 08/09/2003Photoshop provides its users with a powerfull brush palette.These brushes options are numerous and just great:we'll just create a custom brush that we'll be able to save and use later.
Read this photoshop tutorial
|
|